Recording GPS tracks is the core function of Trails. This section explains everything you need to know to record your next outdoor adventure.
Start recording
Recording new GPS tracks
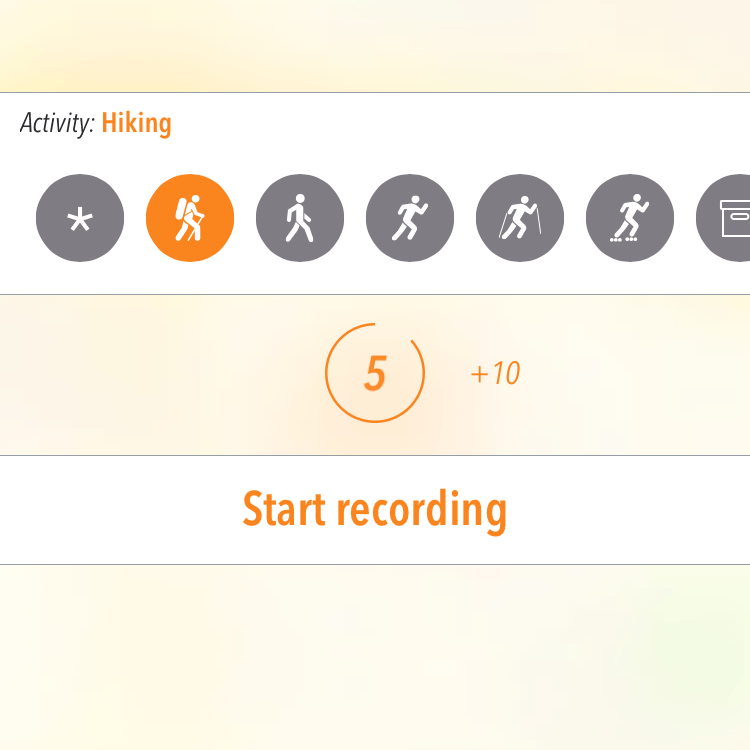
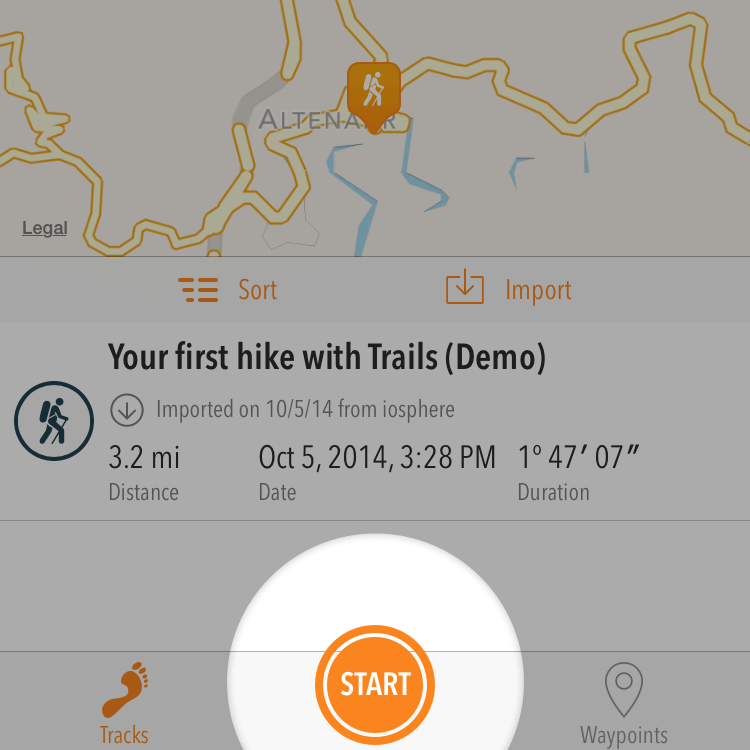
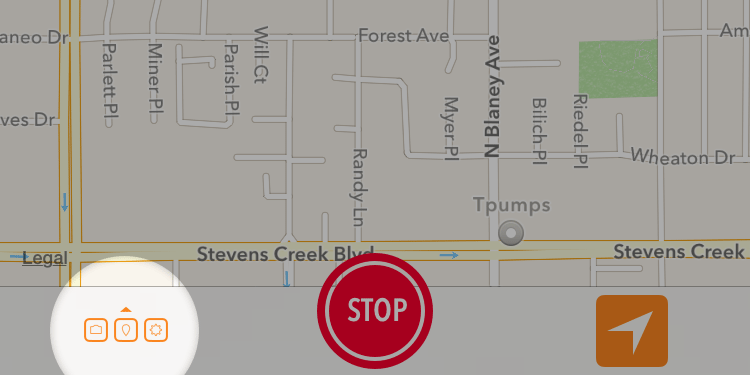
Tap the round Start button in the bottom center of the screen to start recording a new GPS track. You can optionally select the type of activity you are recording (e.g., hiking, jogging, mountain biking...). Simply tap one of the activity icons at the top. You can scroll left and right for more options.
The recording starts automatically after 10 seconds. Simply lock the screen, put the iPhone away and wait for the start beep. If you need more time to choose an activity, tap the +10 button. You can start recording right away by tapping Start recording.
You can disable the start beeps in the Location recording settings.
Continue recording an existing track
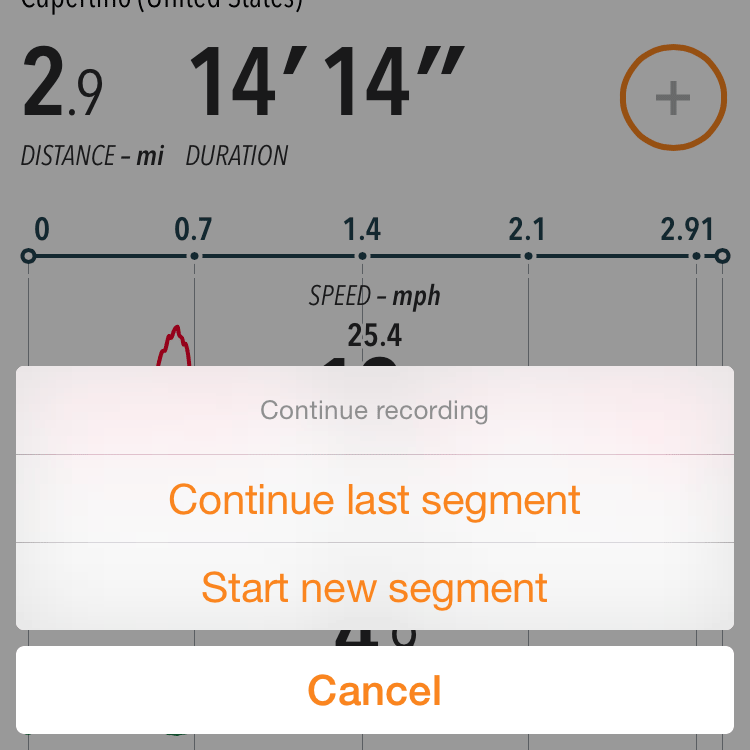
A track is composed of one or more segments. You should decide whether you want to extend your existing track by recording a new segment or by continuing the last segment.
If you select Continue last segment, Trails will continue recording by creating a straight line between the last point of that segment and your current location. The distance and time between these two points will be added to the segment's cumulated distance and duration. This will also increase the track's duration and cumulated distance, and affect other statistics.
Selecting Start new segment will exclude the distance and time since the last point of the previous segment from the recording. This treats the time and duration between these two points as a pause. The duration and cumulated distance of the track will be the sum of the two segments' individual durations and cumulated distances.
One more tip: a track should not be longer than one day. If you are recording a multi-day tour, we recommend creating one track per day. This allows you to use segments to mark pauses during the individual legs of your tour.
Follow an existing track (Routing)
Trails Pro can guide you along existing tracks, regardless if those tracks have been imported or recorded with Trails. You can even follow your current recording if you need to navigate back to where you started.
To start routing, you need to start a new recording first. While recording, you can tap or pull up the menu from the bottom of the screen, and choose Route. You can select an existing track or compose a route from a selection of waypoints.
Statistics 101
Change live statistics
You can select your top four statistics by doing the following in the iOS app:
- Start a recording
- Tap any of the top four statistics at the top of the screen
- Tap another statistic to replace the former, or tap-and-hold any other statistic and drag it around.
Please note that some statistics do not show up until data has arrived, so you may have to wait a few seconds (and possibly move) after starting the recording.
When you are recording on your phone and use the Apple Watch in companion mode, your top four statistics will also be displayed on the watch. If you use the standalone recording mode on a GPS-equipped Apple Watch, you can select the displayed statistics from the menu. Press firmly on the display to bring up the menu.

Live Graphs
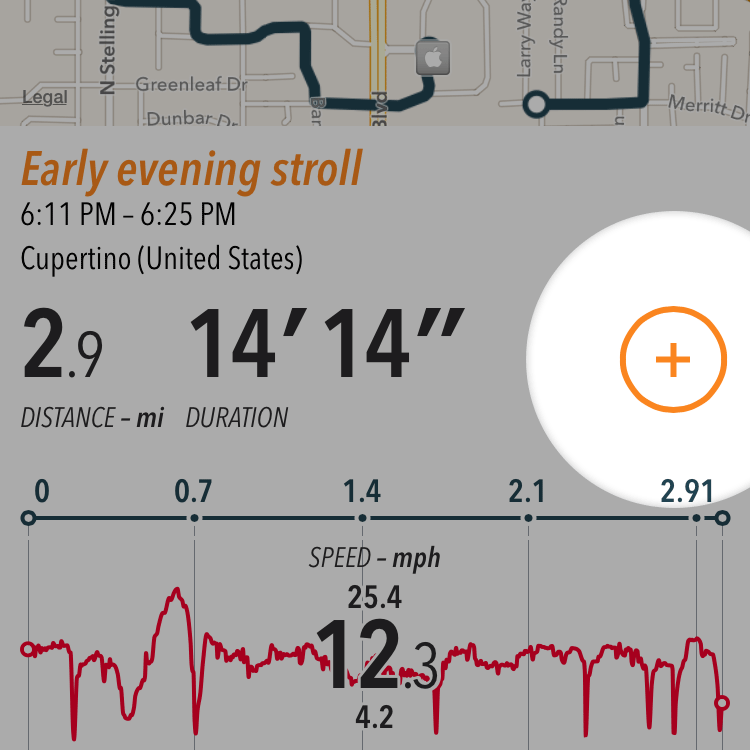
Up to four statistics are displayed at the top of the screen during recording.
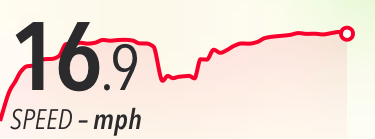
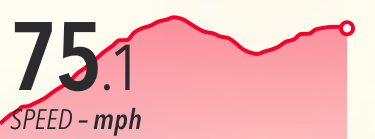
Some statistics provide real-time graphs: speed (red), altitude (blue), pace (green), heartrate (purple),… The live graphs always display the last 50 recorded points on a distance scale (x-axis).
The value axis (y-axis) is constantly adjusted to fit the current value range (rounded). If your speeds are currently between 10 and 20 mph, the y-axis will be adjusted to display this range (instead of showing, e.g., 0 to 20 mph). This means that the minimum and maximum in the graph changes, but this allows you to quickly see if you are accelerating or decelerating.
The gradient color underneath the graph's line indicates if you are close to the minimum or maximum of the overall value range. If for example you are currently cycling at a speed between 0 and 10 mph and you were not faster than that before, the gradient will run from fully transparent to fully opaque red. If you have been cycling at 20 mph sometime before, the gradient would run from transparent to 50 % opaque red. If you later increase your speed from 20 to 30 mph and maintain that speed for a while, you will see that the gradient runs from 66 % to 100 % opaque red.
Mark waypoints
You can easily create waypoints while recording a track. Waypoints help you mark important locations along your track. Waypoints consist of a coordinate (e.g., your current location), name, type (e.g., tower, camping ground), timestamp, and an optional photo. Waypoints can also be used for routing.
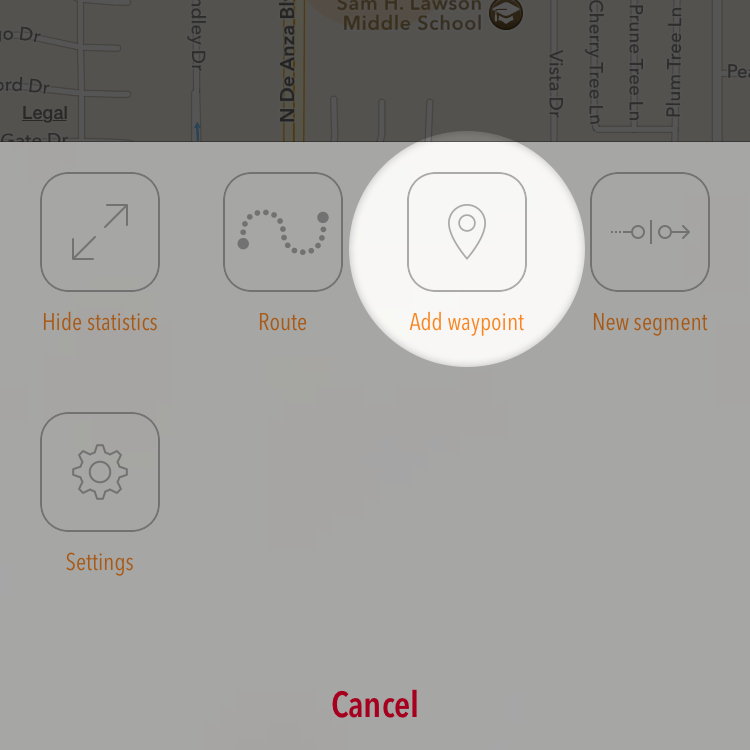
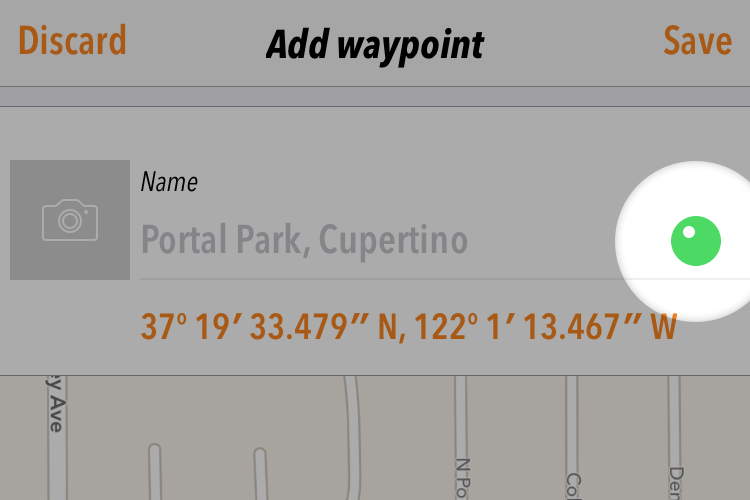
While recording, tap or pull up the menu from the bottom of the screen to create a waypoint. You can then add a name and select its type by tapping the icon to the right of the name.
Tap the coordinate to adjust it. You can drag the map or manually enter the coordinate's degree values.
If you want to add a photograph, tap the camera icon on the left, then take a photo or choose an existing photo from your library.
Tap Save in the top-right corner once you're finished.
Location recording settings
You can change the location recording settings before or during a recording.
When not recording, tap the gear icon in the upper left corner of the main screen. While recording, tap or pull up the menu from the bottom of the screen and tap Settings.
You will find the most important settings under Location recording. We highly recommend using the Automatic mode. This will adjust the location recording settings according to your selected activity, sensor accuracy, and movement.
Advanced Settings
Using the required accuracy, you can automatically discard inaccurate position signals from the GPS. If the accuracy of a position signal is worse (i.e., a higher value) than the value set here, the position is discarded and does not become part of the recorded track. Selecting a restrictive (low value) accuracy leads to fewer (but potentially more accurate) recorded points, but may decrease general point density when your signal is worse for longer periods of time. A lenient (high) required accuracy can lead to outliers being recorded and distorting the calculation of statistics.
The distance filter determines how often location signals are requested. The actual distance between two recorded location points may vary depending on external factors (e.g., weather conditions, clear view to the sky). A low distance filter yields more recorded positions and hence a more fine-grained track and more frequent updates to live statistics. However, if it is too low, too many points may be recorded which means the app has to work harder and will reduce battery life.
You can disable the compass to extend battery life. The compass is automatically disabled when Trails is no longer in the foreground, or when the screen is switched off.
Trails can automatically stop the recording when you return to your start location. Simply enable the option Stop recording when returning to start location. Be aware: If you return to the start location unexpectedly (e.g., to get something your forgot), the recording will be stopped prematurely.
Trails plays a countdown sound for the last four seconds before starting the recording. You can disable this, too.
Under Display settings, you can opt to always keep the screen on while recording. This can be helpful if you have mounted the iPhone to your bike's handlebars. This will however dramatically reduce battery life.
If you activate the above option, you can use the proximity sensor to automatically turn off the screen whenever the screen is covered. This can be useful to switch off the screen automatically when placing the iPhone in your pocket. When you take it out it will immediately switch on again without pressing any buttons.